Wednesday, November 30, 2016

A Victorian Christmas After All?

It seems that this fall/winter is the season that sees me finish projects I started last year at the same time.  Which means the projects that I started this fall/winter will probably be finished next year.  I can live with it!

When cleaning my sewing room the friday after Thanksgiving, fussy and discontented with all my current projects being in the mockup/fitting stage, I came across a natural form-era gown that I had painstakingly patterned, fit, and cut last year.  I had put it to the side because it is an exercise in shirring, and I didn't feel ready for it until now.
 It turns out, hand gathering is the perfect thing to do at the table by the fire with guests for the whole weekend.  I based the gown on the fan-front bodice by Truly Victorian made to the lines of a long 1880 cuirasse bodice.  It is in a sheer, moss-gold-green poly chiffon, which was almost too cheap to mention (it was leftover from wedding decor and I was broke) but I believe will give a good effect overall.


Experimenting with draping paniers.

The bright green underskirt/lining will be completely covered by the chiffon; oddly enough, this was the only backing that I felt brought out the 'true color' of the sheer fabric.

Tape has been stitched to the shirring in the back train where it isn't fully lined.
My main design questions are the direction of shirring on the skirt: Vertical like this:
Mody Paryzkie 1879.: Concert dress with panier and long train with ricsh mousseline balayeuse.:

Or horizontal like this? (on the left)
The Season 1883:

OR horizontal with poofs like the one on the right below?

Revue de la Mode 1881:


Honestly, I might just go with whatever seems less time consuming, since I now have the slightest hope of a new gown for this year's Victorian Christmas Tea on the 17th! (Can totally do this...)


Wednesday, November 16, 2016

What I've been up to lately...

Treating my dressform like a large doll
1950s style petticoat over 18th c. Paniers


Mocking up a turn-of-the-century princess gown
Tight sleeves with a slight head, and a tight bodice with as few seams as possible.  What could go wrong?
Trying out Norah Waugh's 1904 ribbon corset, and dying my own linings to match


Planning an evening gown
The one one the right? Mauve silk taffeta?
Reading the very charming Tales Told in Holland, usually while sitting by the fire

And, you know, some other stuff.  Toodles!

Tuesday, November 8, 2016

Ozma's Diadem


The fabrication of the iconic Diadem was no simple matter.  The poppies were easy enough, I had dyed silk organza a bright red (redder than the photo) and formed the petals.  The stamens were black beads twisted on gold colored wire and sewn to a black velvet pad.  I made the stems by pulling upholstery cord through a silk bias tube.  


For the center piece, I decided to go with Bronzclay, since I had experimented with it last year, and had all of the tools.  If you haven't used precious metal clay before, it is amazing stuff.  You roll it, mold it, stamp it, sculpt it, like a regular (albeit very sticky and finicky) clay, then you bake it in a kiln and it becomes metal.  The finish is very matte after baking, the shine was achieved after an hour with a dremel and some jewelry-grade buffing oil.  The bubbles and pits had to do, I think, with the firing: the piece was a little too big for the pan, and I might not have kneaded the air out enough to start.  


The bands are simply corset boning painted gold.  The centerpiece clips onto the bands using some prongs I set into the back, also made of clay.  This worked way better than I would have thought.
Ta da!

Tuesday, October 25, 2016

Ozma of Oz

The Lost Princess of Oz (1916).  Illustration by John R. Neill

I had the chance this year to go to a Wizard of Oz themed Steampunk party in October.  Being a minor Oz expert, and already having a green gown, I knew my role would be Ozma, Ruler of Oz.

Finished pictures now, I'll break down the costume and accessories in the next post!


Monday, November 16, 2015

The Wedding Suit, Construction and Completion

Construction
The waistcoat was made first, being small and attainable.  While I love the finished look of a shawl collar, I decided to go with a laid-on collar because it reduced bulk in the back and allowed for a nice inner curve to the lapels, which I coveted.  The construction for this was fairly simple, and when he wore it out into the afternoon sunlight the big cut-glass beads along the lapels shot shafts of colored light.

Waistcoat lapels at edges, beaded before cutting.
I tailored the coat next, padstitching it to hair canvas,The Victorian Tailor by Jason Mclachlann.  Go there if you want to feel small and insignificant under the weight of the lifetime of mastery it takes to really be a tailor.  For example, the essential art of shaping the suit with an iron “is not included in the scope of this book”, but most other things are.
a technique I learned through the glorious Gertie’s Blog for Better Sewing.  If you want to know how to tailor, go there.  I also had lotsa help from
I sewed the back and shoulder seams by hand, because I did not have a zipper foot that could get close enough to the beadwork for a smooth seam.  The tendrils curling onto the front don’t meet at the shoulder seams, and that was unfortunate, but better luck next time!  It’s not like it was easy!
The jacket was fully bag-lined with two inside welt pockets and lots glass buttons.  I made keyhole buttonholes on my friend’s Janome. 
I practiced my padstitching on the Suit's predecessor
Look at the hand on that gab!
Apparently I only took pictures of the sleeves while constructing.
On the right you can see the back panels painstakingly handstitched together.

The trousers were probably the most complicated!  I started with the laughing moon California pants pattern, and changed it to reflect the grown-on waistband that gets all cool and high in the back.  It was to be held up with suspenders for a smooth line over the abdomen.  I followed the trousers instructions in The Victorian Tailor for making up.  After cutting the facings, interfacing, suspender button stays, pocket stays, waist stays, hip stays, curtains, pockets, etc.  I must have had 30 pieces all told of three different fabrics.  I did a lot of hand basting, and finished the pockets as per the recommendations.  I had cut them slightly too short so I added a shaped facing for the hem rather than turning it up.  The nine button fly features nine hand sewn buttonholes because the trousers were constructed over a brutal heatwave leaving my sewing room too hot to work in and me naked in the living room trying not to sweat on the gabardine.


We completed the outfit with silk trouser socks from REI, an antique brooch in the figure of Hanuman, a vintage Italian tuxedo shirt with a pique front, vintage studs and cuff links that I had bought him years ago, and the most gorgeous shoes I have ever seen.  They were ordered from Pakistan, and embroidered with gold thread and tiny metal coils, which is apparently what bullion is!  It was like if Aladdin was Cinderella.  We kept them secret until the very day.
Shoes and wedding china!
All together now!


A Wedding Suit for a Sun Prince

When I decided to marry my darling dumpling, and that I was going to have the finest and most spectacular dress I could possibly imagine, I knew that he must have the finest and most spectacular suit he could possibly imagine.  Luckily he already knew what he wanted, and the first sketch I made in my school notebook looks a lot like the finished product.  We decided on a morning suit in ivory, elaborately embellished somehow.  It seemed most reasonable that the embellishment be glass beads, and such a thing only seemed reasonable because I had recently acquired an eight foot long rolling quilting frame that seated six. 


I had never made a full tailored suit before, so to practice and also to time things out, as well as perfecting fitting, I made a full wearable mockup in a dandy striped cotton.


I had already made him a shawl-collared double-breasted waistcoat the previous year in the same fabric, so he had a smart suit going on, and I had a waistcoat and coat pattern, both of which I adapted from the Simplicity pattern.  Here as well, full historical perfection was not what was required, but I was not going to scrimp on any technique!
Finding the fabric was a challenge; I could not procure an ivory gabardine for even ready money.  Moire was too distracting, faille too ribbed.  I was sincerely considering duchesse silk satin and groaning at the thought.  Finally I discovered wool/silk gabardine which is carried at Fashion Fabrics Club in a dizzying array of colors, including the perfect ivory.  It cost about as much as the duchesse satin, but for some reason seemed hardier.  It was.

Slk-wool gabardine from Fashion Fabrics Club.

Sewing folks, use this fabric.  It has an amazing subtle sheen almost like satin, a dense weave, and a firm hand.  A tube stands up on the table.  It presses perfectly, and stretches on the bias.  It was quite expensive and worth every penny as the canvas for a glass and crystal masterpiece. 
I took my cue from historical embroidered garments where the pattern pieces are embellished before they are cut.  Bit by bit, I traced the pattern pieces on paper and drew in the beading design in pencil.  This was then transferred to the fabric using a light box, or in my case, a window as a leaf in a dinner table with lamps under it.
Improvised lightbox

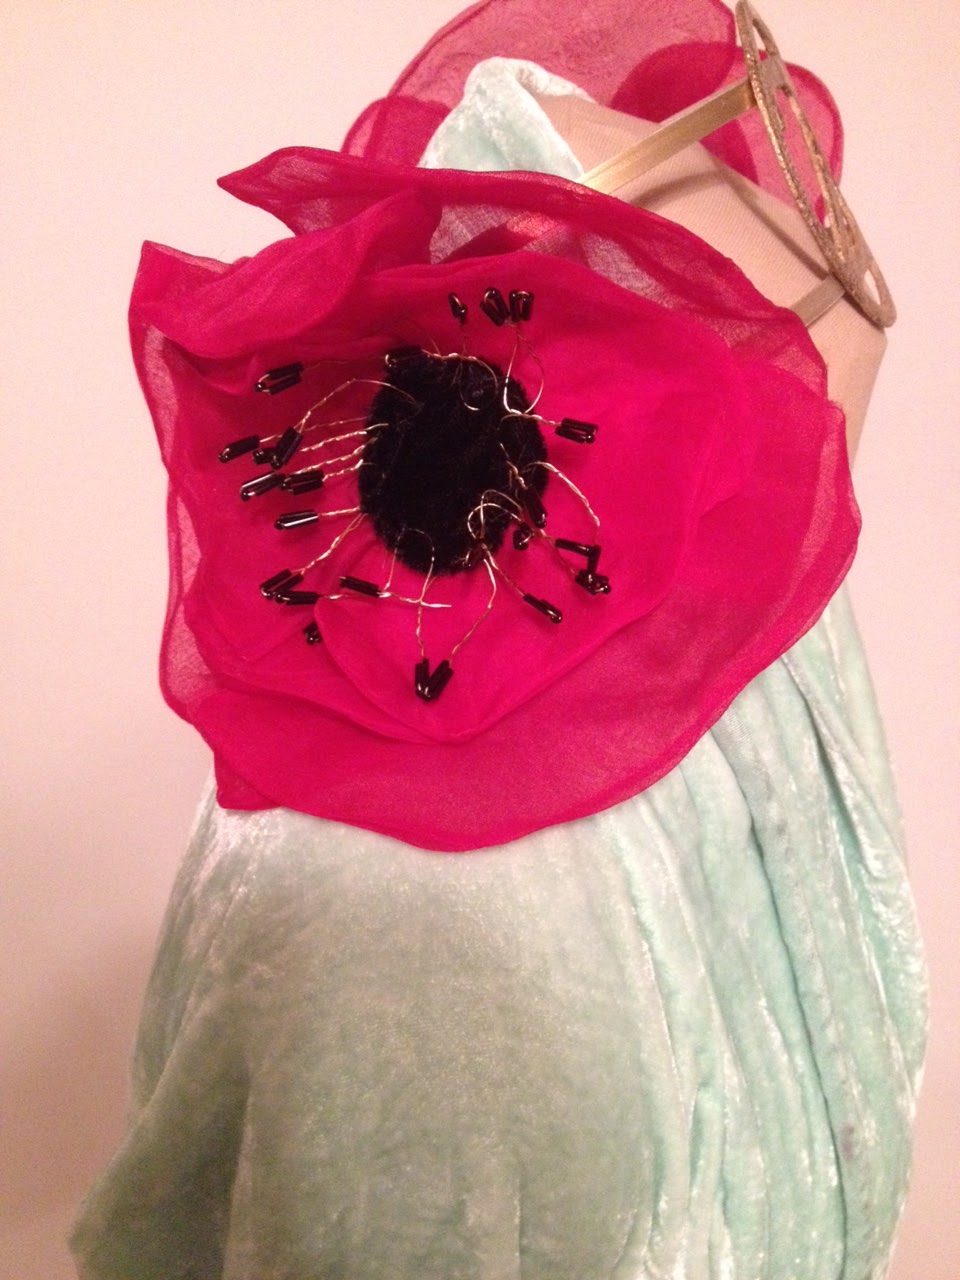
  M chose the main iris motif of my own gown for the back of his jacket, inverted, with the long curling fronds at the shoulders, tapering to a point at the waist seam.  The rest of the beading I made up, spots of density to mark out lapels and collars, a smattering of vertical bugles on the sleeves suggesting epaulets, a bright crystal at his heart.  The rest was individual seed beads and bugle bead stars spaced sporadically down the garment and tails.


This frame is really big, hence its status as My Secret Sewing Weapon.
I got it for a latte and a pumpkin loaf

After marking, the length was rolled onto the frame and beading began in earnest.  Never having done such a thing, I went to Harlequin beads, our local bead store, and asked advice.  I came away with a bag of clear, silver lined, and iridescent seed and bugle beads, crystals, glass pearls, thread that looked like dental floss, and long thin needles that resembled nothing more than wisps of steel. 

First batch of beads

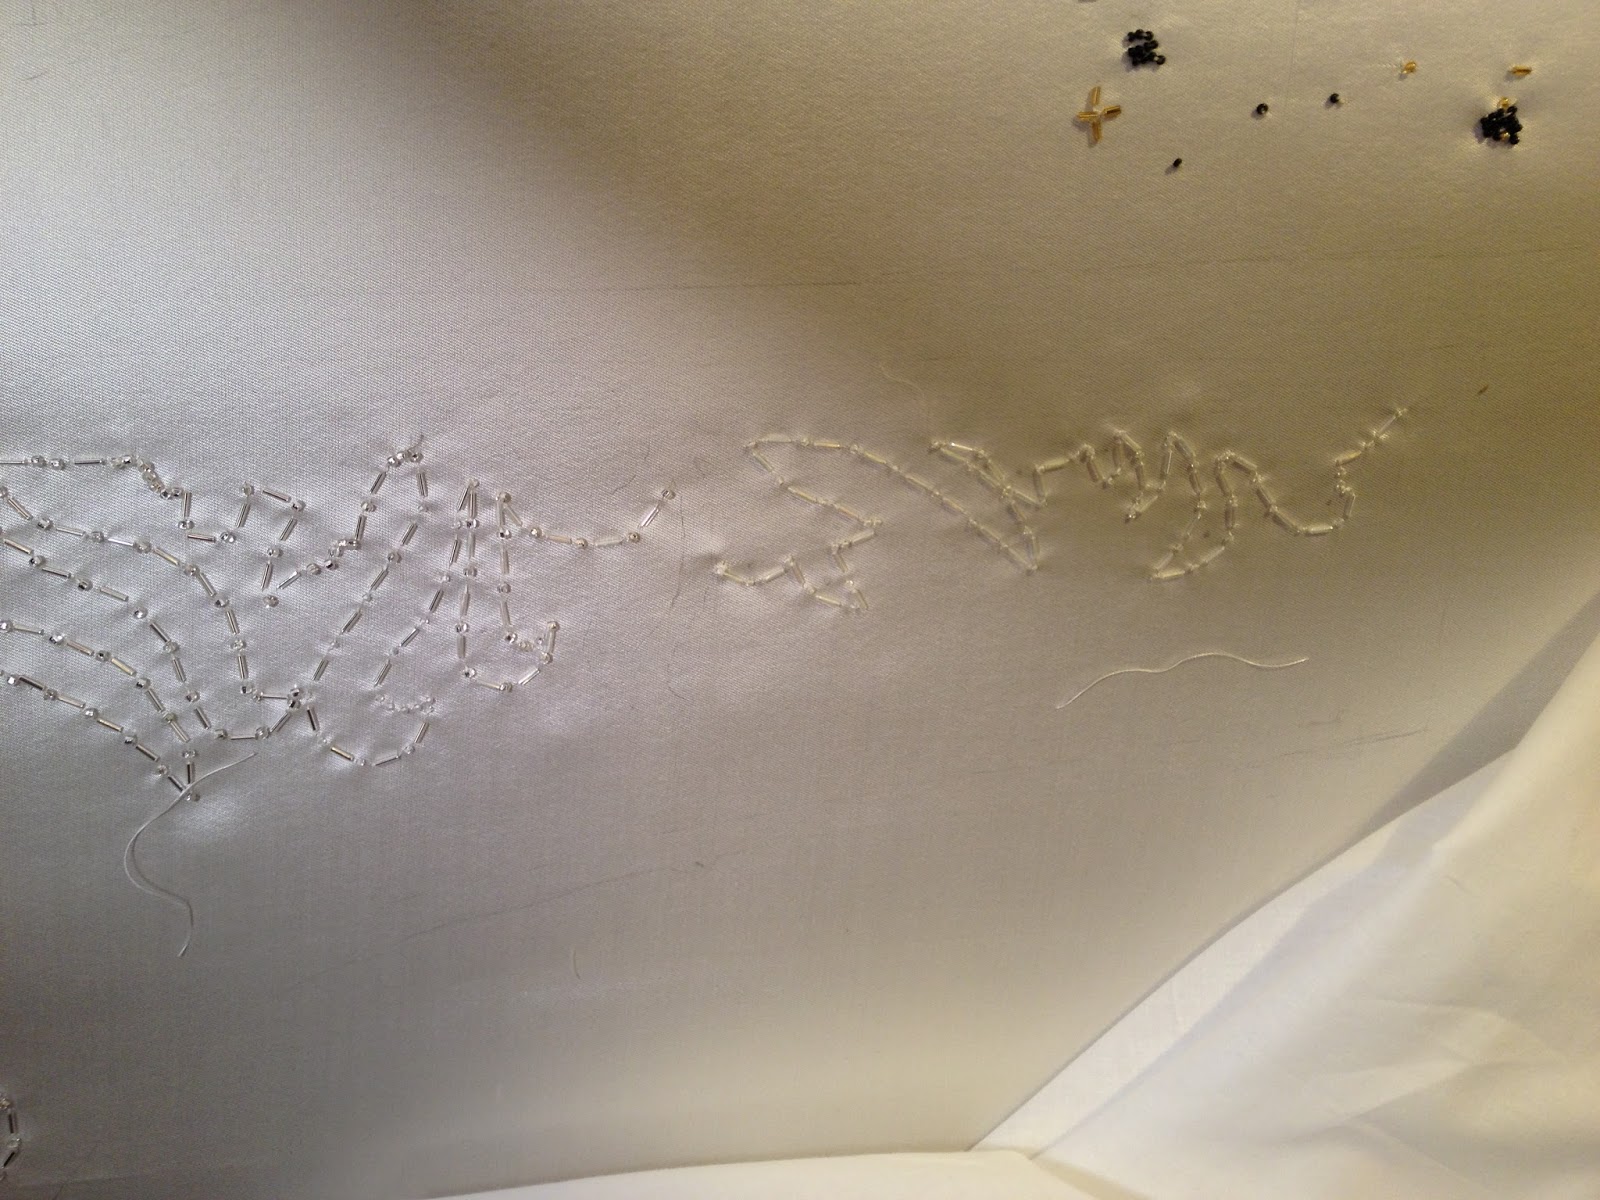
We quickly discovered that a) the sheen of the fabric rendered marks invisible when lit directly, b) it is hard to scoop beads out of shallow containers, and c) even needle threaders weren’t small enough to thread the needles.  We solved the problems by lighting underneath the fabric, which backlit the beads perfectly and helped differentiate the silver-lined from the clear when it mattered.  The beads were placed on squares of velvet, and I threaded most of the needles, getting 10-20 at a time ready before a session.

Backlighting makes it better!
Gabardine on the frame, practice beading in black.


The halves were separate, the back seam stitched by hand later to meet the beading as much as possible.
We beaded for about two weeks straight over Thanksgiving just to finish the main back motif.  The rest was done gradually but regularly.  Meanwhile, we ordered vintage cut glass buttons and a glass buckle.
Outline of main back motif

Finished half of back (above)  with waistcoat collar (below)

Waistcoat collar with sample beading

The back fronds curled over shoulders

Other shoulder, the threads are visible because of the underlighting, which makes the silver-lined beads look almost black.

Upper Collar

Detail of Upper Collar