The Underskirt in silk twill was flatlined with cotton muslin, sewn, hung, picked out,
trimmed, hung, trimmed, sewn, hung, trimmed, hemmed. The silk twill stretched way over the cotton
on all the bias seems, leaving weird baggy butterfly wings over the diagonal
seams on the skirt. Ick! But I followed the above and eventually got
things down to shape. The tiny darts
were first basted through, then basted closed, then sewn. As you can see, the train needed a lot of
trimming to get to the correct circular shape, it stretched out to much more of
a diamond.
 |
| Before trimming |
 |
| After trimming and hemming |
I hemmed it, then started working on the under-hem
trimmings. This was a detail of the
original that I absolutely loved. You
can see that under the hem there is a flush folded strip of the same fabric
that goes all the way round, and under that a line of sawtooth trim. After finally figuring out how to make the sawtooth trim, I deemed it
impossible. Here it is: you fold the fabric in half, sew an inch or so down, cut the folded edge into neat squares, poke the corners of the squares in until they look like triangles, then slipstitch the edges. Yikes! Even if I got good at that I would have had to devote another 500 hours to it
(wild surmise, but probably true). So I
settled for box pleats.


The first layer of undertrim was a bias strip of silk twill
flatlined with bias silk organza and folded.
It was a weird way to do it, but it lays nicely under the skirt.
I then took a looovely shortcut and interfaced a length of
silk twill with cotton fusible interfacing before cutting it into 10” strips,
folding it in half lengthwise, and pleating it.
The resulting pleats are heavy, but they help the skirt bounce along the
ground, and the underhem trim looks wonderful when the skirt inevitably folds
up along the edge.
Pleats and underhem
trim pics


After carefully laying it out, cutting it into strips, and
hemming it (rolled with my fingers under a straight stitch) I gathered the
ruffle to compensate for the stretching it received during hemming, which
brought the pleats back together for dramatic fluting. I got that
tip from the impeccable American Duchess, who used the technique for her
pressed fluted flounces on her stunning Green Acres gown.
Then it was a matter of pinning and sewing and pinning and
sewing.


For the overskirt, I laid the chiffon over the pattern and
traced the outline of the skirt halves and the sequin design with pencil. One at a time, the halves were laid flat,
carefully weighted, and the sequin application began. I bought 3 144 yard rolls of pre-strung flat
sequins; I had no idea how many I might need and that gave my amazing helpy
sewers each their own spool. We used
nylon monofilament and eventually figured out that it was way easier if you
glued the sequins on with glue stick before sewing. The process was incredibly time consuming and
tedious. I didn’t dare stretch the chiffon on a frame, because when unstretched
the sequins would wriggle unpredictably; a sampler I had done previously
confirmed that. So we worked it loose
and flat, while the monofilaments caught at the sequins and snagged them out of
their carefully placed curves. I would
reckon a hundred hours. For each
half. Everybody agreed that was the
worst.

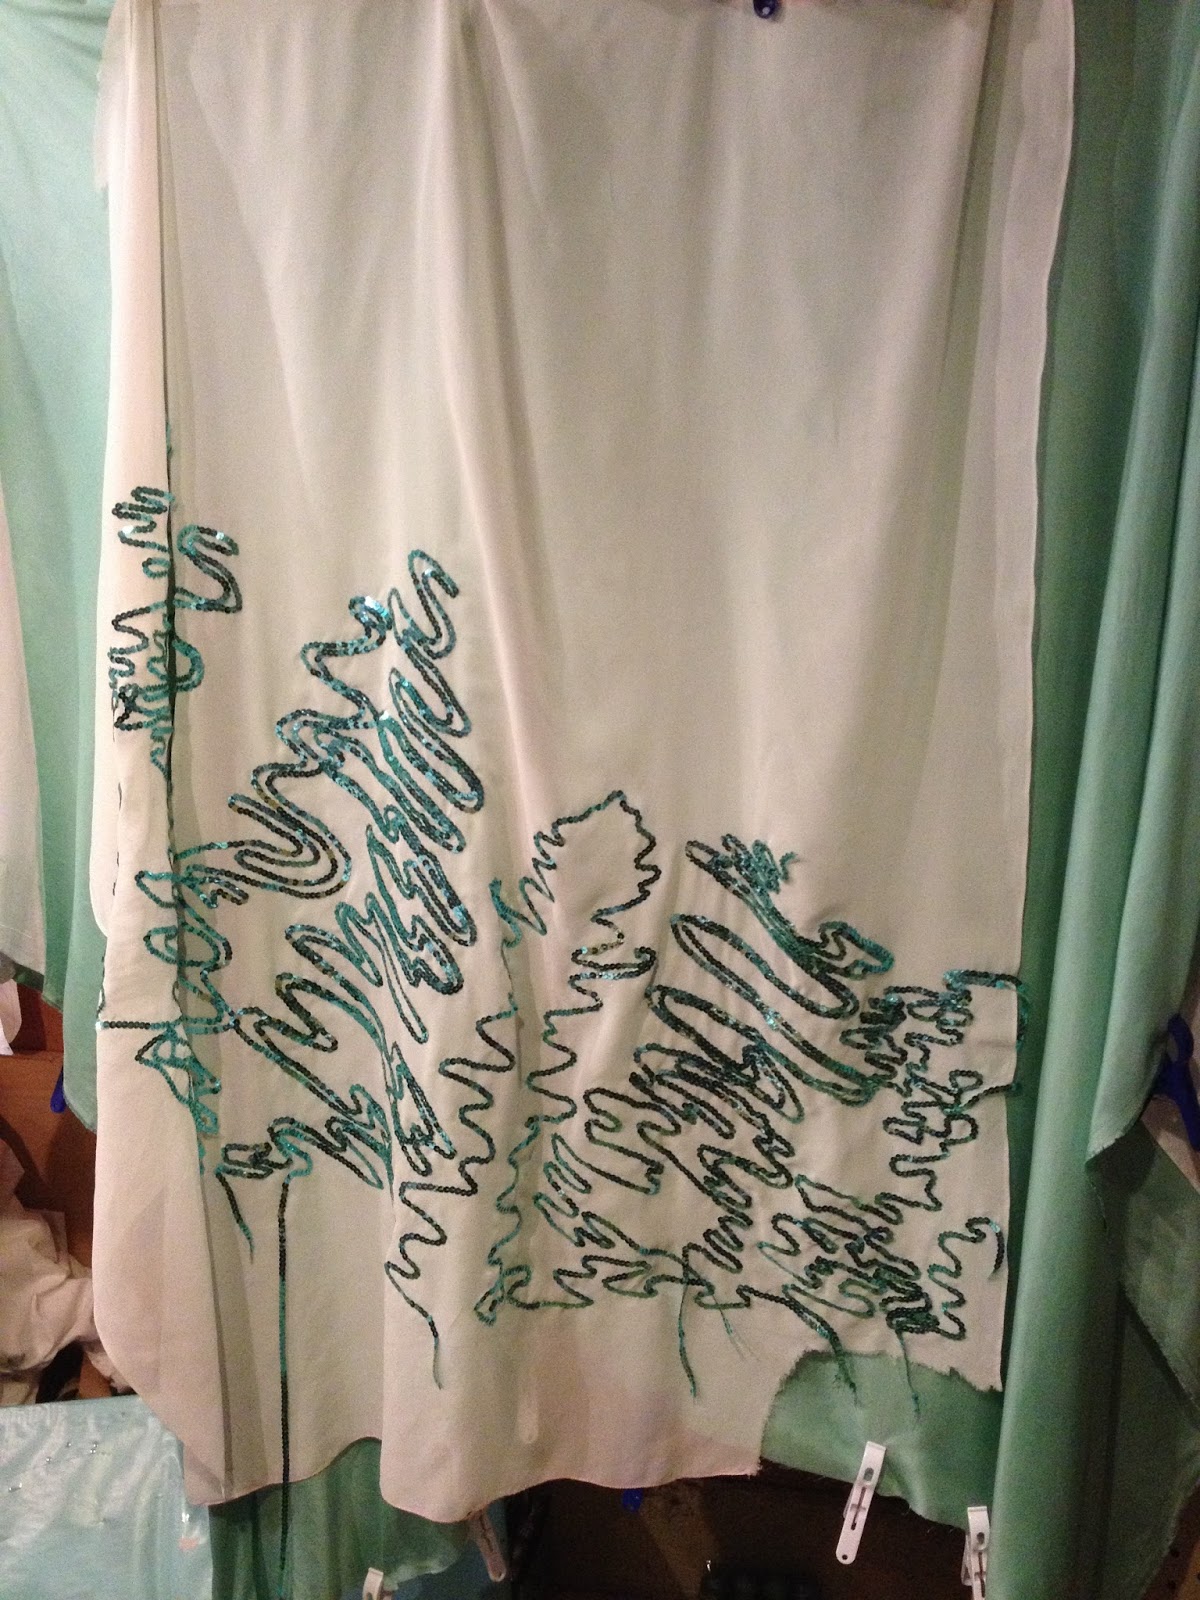 |
| One of two overskirt panels |
After the sequins were finished (what a day!), the halves
were trimmed and hemmed. The last
chiffon ruffle was stitched over the hem.
A quick steam (which curled some of the plastic sequins, tarnation!) and
it was ready for the velvet. But was I?

 |
| Un-ruffled overskirt draped on underskirt. The layers must meld and flow. |
My steamer was at the woodshop where my husband-to-be and
his team were using it to steambend wood for the archways that would grace our
ceremony. So I ironed the five yards of
hanging velvet with puffs of steam from my upright iron (my elbow braced
solidly on my hip) and a boar bristle hairbrush.
The motifs were traced on the backside of the velvet with a
mechanical pencil; I used dots and dashes more than lines because the pile was
so shifty. Each motif took 15 minutes to
trace, and a full hour to cut with a 45 mm rotary cutter. I kept them laid out and sandwiched between
sheets of paper until it was time to go to work.

The observant eye will note that the velvet appliques on the
original gown have a ruched appearance.
This may be the case, or it may be wrinkling from storage. In my case, I chose to ignore it because the
feat of patterning that would give me spindly motifs that would gather neatly
down to perfect proportions sounded…iffy.
It’s possible that strips were ruched and trimmed and shaped into curls
as they were applied, which makes sense given the charming irregularity of the
hemside swirls and the fact that Worth had workhouses of skilled embroiderers
at his disposal. Since it was my first
time, I decided to go ‘easy’ and simply cut the motifs flat.
The glue stick was so effective that I used it to stick on
the motifs, arranging each frond before gluing it down. Some of the interweaving bits were left
unglued till later in the process. Then
each line was edged with satin rattail cord, couched on by hand. My assistants and I used small stitches to
‘pinch’ the cord at intervals, a look consistent with the original and
attractive in its own right. The edge of
the velvet was caught down on either side with the couching, so cord and
applique were applied in the same stroke.
Thank goodness.
 |
| Finished overksirt! The fold on the right is center front. |
Each iris took 12-14 hours to couch. First, the two middle motifs on each side
were finished. Then the backs were sewn
together and the back motif was applied.
Then the fronts were seamed and the front applique was applied. I don’t really remember how I finagled that,
but there must have been enough fabric to push the rest aside. When all were
finished, the ends of the cord were threaded through awl-holes to the back,
where they were fastened to the back of the motif with tiny unobtrusive
stitches. The overskirt was draped on
the underskirt for placement; marked, trimmed, and the darts sewn up, and I
tried that puppy on.
Unfortunately, I had made the front of the underskirt a full
two inches short, which meant the whole mass pulled at the front of my ankles
as I walked; my slippers were flat, so I wanted it to just touch the
floor. To compensate, I added a shaped
yoke out of interfaced silk twill that lent a few more inches to the top of the
waist, and to my delight that mostly worked!
The underskirt pretty much hid the yoke seam. Then waistband. Then hooks and eyes. I even added the little butt pocket included
in the Janet Arnold pattern, and which also appears on the Oak Leaf Dress to
much speculation. I’m pretty sure it’s
for a fan or a hankie, but I made the opening of mine a bit small which,
combined with the awkward angle, would necessitate a lead rope to retrieve the
items.


The poochiness at the back was later fixed by a bumpad, and the waistband was taken in a bit at the back; the overlap was decreased to decrease bulk in general, since I found I was having to lace to 22 1/2" to fit the 23 1/2" bodice. Yikes!
It was heavy, but I did some testing by spinning around and letting the train orbit for a while; nothing came flying off, nothing ripped. Hurrah!
Where did you send your fabric for pleating?
ReplyDeleteStanley Pleaters in New York, but there are lots more!
ReplyDelete